Elasticsearch客户端Kibana安装使用
Kibana是一个开源的分析与可视化平台,设计出来用于和Elasticsearch一起使用的。你可以用kibana搜索、查看存放在Elasticsearch中的数据。Kibana与Elasticsearch的交互方式是各种不同的图表、表格、地图等,直观的展示数据,从而达到高级的数据分析与可视化的目的。
Elasticsearch、Logstash和Kibana这三个技术就是我们常说的ELK技术栈,可以说这三个技术的组合是大数据领域中一个很巧妙的设计。一种很典型的MVC思想,模型持久层,视图层和控制层。Logstash担任控制层的角色,负责搜集和过滤数据。Elasticsearch担任数据持久层的角色,负责储存数据。而我们这章的主题Kibana担任视图层角色,拥有各种维度的查询和分析,并使用图形化的界面展示存放在Elasticsearch中的数据。
Kibana 用户手册: https://www.elastic.co/guide/cn/kibana/current/introduction.html
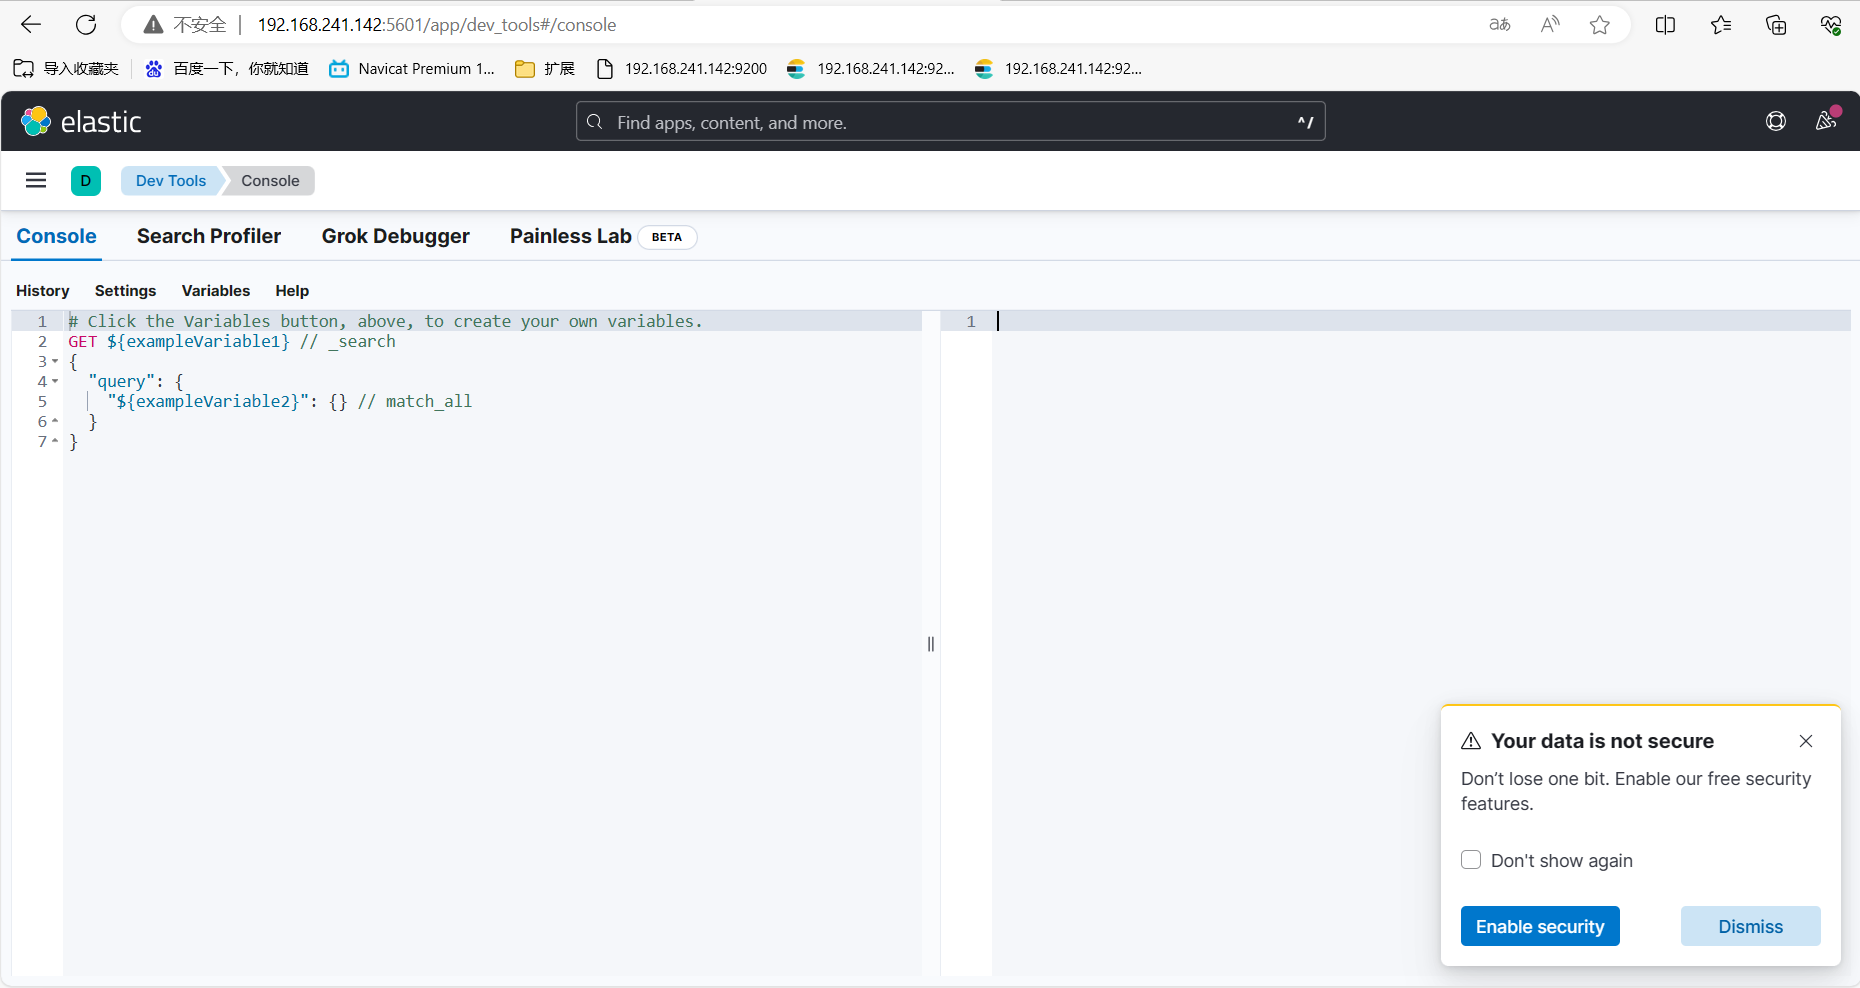
Kibana登录: http://192.168.241.142:5601/app/dev_tools#/console
1、安裝
注意:Elasticsearch和Kibana的版本需要对应。
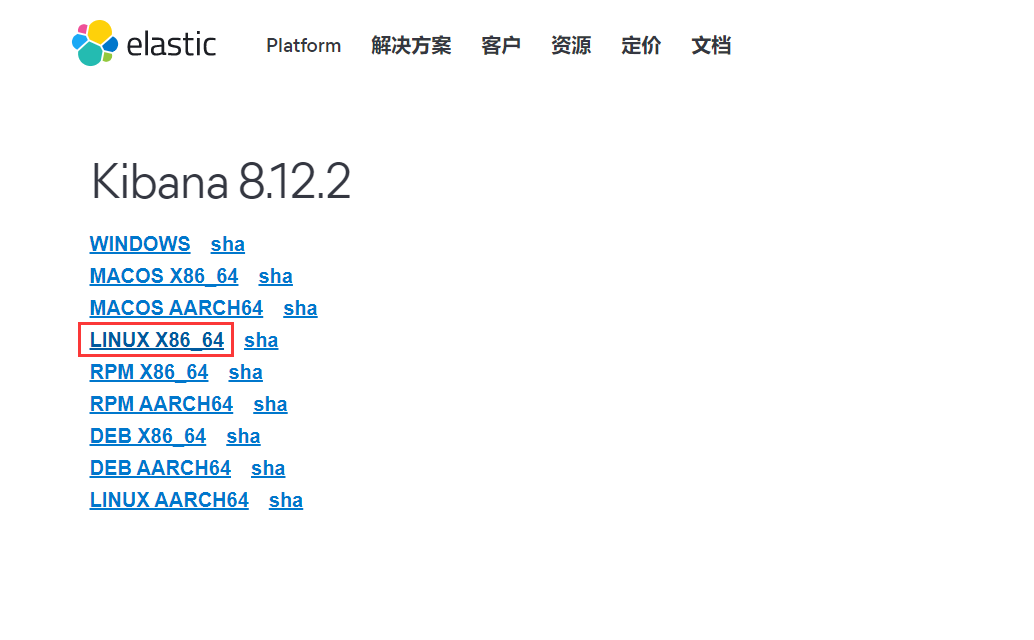
下载地址 :https://www.elastic.co/cn/downloads/past-releases#kibana

2.安装
因再es安装目录 所以用es用户
下载Kibana放在 elasticsearch 同级目录中
[root@bogon src]# wget
[root@bogon src]# tar -zxvf kibana-8.12.2-linux-x86_64.tar.gz
[root@bogon src]# mv kibana-8.12.2 /usr/localkibana812/
进入/usr/localkibana812/config目录,
[root@bogon kibana812]# cd config/
[root@bogon kibana812]# vim kibana.yml

server.port: 5601
server.host: "0.0.0.0"    # 此处不能写“localhost”,否则访问不了kibana
elasticsearch.hosts: ["http://192.168.241.142:9200"]    #这里是elasticsearch的访问地址
登录 Kibana不能使用root用户
[root@bogon kibana812]# chown -R cc:cc /usr/local/kibana812/
[root@bogon bin]# su cc
3.启动Kibana
1、进入bin目录,
[cc@bogon kibana812]# cd bin/
2、前台启动 (关闭服务 关闭窗口 或者ctrl+c)
[cc@bogon bin]$ ./kibana

后台启动
nohup ./bin/kibana &

关闭服务    根据端口查进行  然后 kill掉
lsof -i:5601     会出多个  kill 第一    [object Object]
4、页面访问
ip:5601
访问 : http://192.168.241.142:5601/

5. 关于索引的基本操作
当然不是只有 kibana可以测试,使用其他软件如 Postman或者T alend APTTester都可以。
我这里使用的 kibana.
1、创建索引并添加数据
# 在kibana输入

POST /test2/_doc/1
{
    "name": "Ringo",
    "age": 18,
    "birth": "1997-11-13"
}
2、我们自己没有为索引写mapping映射查看索引默认的信息
GET /test1
或
GET请求 192.168.241.142:9200/test2

# 返回的结果,ES给我们的字段自动加上了类型
{
    "test2": {
        "aliases": {},
        "mappings": {
            "properties": {
                "age": {
                    "type": "long"
                },
                "birth": {
                    "type": "date"
                },
                "name": {
                    "type": "text",
                    "fields": {
                        "keyword": {
                            "type": "keyword",
                            "ignore_above": 256
                        }
                    }
                }
            }
        },
        "settings": {
            "index": {
                "routing": {
                    "allocation": {
                        "include": {
                            "_tier_preference": "data_content"
                        }
                    }
                },
                "number_of_shards": "1",
                "provided_name": "test2",
                "creation_date": "1708997613196",
                "number_of_replicas": "1",
                "uuid": "TUsCx7TnRgq5Z6XK3Ltg_w",
                "version": {
                    "created": "8500010"
                }
            }
        }
    }
}
如果自己的文档字段没有指定类型,那么 elasticsearch就会给我们默认配置字段类型!
2.关于文档的基本操作
# 1、创建文档
POST请求 http://39.97.3.60:9200/ringo/_doc/1
{
  "name": "RingoTangs",
  "age": 18,
  "describe": "铃铃铃",
  "tags": ["阳光","喜欢篮球","喜欢学习"]
}

# 2、获取数据
GET请求

# 3、更新数据,PUT如果不写全字段就会被覆盖
PUT请求 http://39.97.3.60:9200/ringo/_doc/3
{
  "name": "李四233",
  "age": 30,
  "describe": "法外狂徒,李四",
  "tags": ["靓仔","喜欢唱歌","喜欢学习"]
}

# 4、推荐使用POST来更新,自由度很高,携带的JSON可以只写修改字段
POST请求 http://39.97.3.60:9200/ringo/_doc/3/_update
{
   "doc": {
      "name": "李四999"
    }
}
3、简单查询
GET请求
或
GET /ringo/_search?q=name:李四


GET请求 http://39.97.3.60:9200/ringo/_search?q=tags:篮球
4、复杂查询
# 1、带上查询条件,match只要名字中有"张三"的都会被检索出来
POST请求 http://39.97.3.60:9200/ringo/_search
{
    "query": {
        "match": {
            "name": "张三"
        }
    }
}
# 2、查询结果返回具体的字段,使用"_source"
POST请求 http://39.97.3.60:9200/ringo/_search
{
    "query": {
        "match": {
            "name": "张三"
        }
    },
    "_source": ["name", "age"]
}
# 3、查询结果排序,使用"sort",通过某个字段进行排序
POST请求 http://39.97.3.60:9200/ringo/_search
{
    "query": {
        "match": {
            "name": "张三"
        }
    },
    "_source": ["name", "age"],
    "sort": [{
        "age": {
            "order": "asc"
        }
    }]
}
# 4、分页查询 "from"从哪里开始,“size"每页显示几条数据
POST请求 http://39.97.3.60:9200/ringo/_search
{
    "query": {
        "match": {
            "name": "张三"
        }
    },
    "_source": ["name", "age"],
    "from": 0,
    "size": 1
}
# 5、通过"bool"和"must"组合使用,可以多条件组合查询,等价于and
# 会把name="张三"和age=30的文档查出来
POST请求 http://39.97.3.60:9200/ringo/_search
{
    "query": {
        "bool": {
            "must": [{
                "match": {
                    "name": "张三"
                }
            }, {
                "match": {
                    "age": 30
                }
            }]
        }
    }
}
# 4、"should"有一个条件符合即可,等价于or
# 会把name="张三"或者age=18的文档查出来
POST请求 http://39.97.3.60:9200/ringo/_search
{
    "query": {
        "bool": {
            "should": [{
                "match": {
                    "name": "张三"
                }
            }, {
                "match": {
                    "age": 18
                }
            }]
        }
    }
}
# 5、"must_not"查询年龄不是18岁的人
POST请求 http://39.97.3.60:9200/ringo/_search
{
    "query": {
        "bool": {
            "must_not": [{
                "match": {
                    "age": 18
                }
            }]
        }
    }
}
# 6、查询结果过滤,范围查询
# gt:大于
# gte:大于等于
# lt:小于
# lte:小于等于
POST请求 http://39.97.3.60:9200/ringo/_search
{
    "query": {
        "bool": {
            "must":[{
                "match": {
                    "name": "张三"
                }
            }],
            "filter": {
                "range": {
                    "age": {
                        "gt": 19
                    }
                }
            }
        }
    }
}
# 7、多条件使用空格隔开,只要满足其中一个结果就可以被查出
POST请求 http://39.97.3.60:9200/ringo/_search
{
  "query": {
    "match": {
      "tags": "喜欢 阳光"
    }
  }
}
# 8、精确查询term  "term"输入的词不会被分词,"match"会使用分词器解析
# term查询是直接通过倒排索引指定的词条进行精确查找的!
# 注意:keyword类型的字段不会被分词器解析!!!
PUT /testdb
{
  "mappings": {
    "properties": {
      "name": {
        "type": "text"   # text类型会走分词器
      },
      "describe": {
        "type": "keyword"  # keyword不会走分词器,当成一个整体
      }
    }
  }
}
GET /testdb/_search
{
  "query": {
    "term": {
      "describe": "Ringo 每天都要好好学习"
    }
  }
}
# 9、高亮查询
# 测试样例
GET /testdb/_search
{
  "query": {
    "match": {
      "name": "棠时"
    }
  },
  "highlight": {
    "pre_tags": "<p class='key' style='color:red'>",
    "post_tags": "</p>",
    "fields": {
      "name": {}
    }
  }
}
# 结果
"highlight" : {
    "name" : [
        "<p class='key' style='color:red'>棠</p><p class='key' style='color:red'>时</p>每天都要开心"
    ]
}
other
#查询所有索引
GET /_cat/indices?v

#查询健康
GET /_cluster/health

#单机情况下是不需要设置副本分区数。调整副本分区数为0
PUT _settings
{
    "index" : {
        "number_of_replicas" : 0
    }
}

#创建索引
PUT user
{
      "mappings" : {
      "properties" : {
        "age" : {
          "type" : "integer"
        },

        "name" : {
          "type" : "text"
        },
         "name2" : {
          "type" : "keyword"
        },
           "name3" : {
          "type" : "text",
          "fields" : {
            "keyword" : {
              "type" : "keyword",
              "ignore_above" : 256
            }
          }
        },
        "hobby" : {
          "type" : "text"
        }
      }
    }
}

#查询索引 类型
GET user/_mapping

#查询索引下所有文档
GET user/_search

#添加文档
PUT user/_doc/1
{
    "age": 18,
    "name": "张三风",
    "name2": "张三风",
    "name3": "张三风",
    "hobby": "爱吃饭,爱钓鱼"
}

PUT user/_doc/2
{
    "age": 18,
    "name": "张三",
    "name2": "张三",
    "name3": "张三",
    "hobby": "爱吃饭,爱钓鱼,爱祖国"
}

#按条件查询  类型 keyword查询时条件只能全匹配    text全文索引查询,查询时会先分词,然后用分词去匹配查询
#keyword+text类型,一个字段两种类型,可以全匹配,也可以全文索引查询
# keyword
GET user/_search
{
 "query": {
   "term": {
     "name2": {
       "value": "张三"
     }
   }
 }
}

# text  使用match
GET user/_search
{
 "query": {
   "match": {
     "name": "张三"
   }
 }
}
#keyword+text查询例子,name3(text+keyword)的查询。
GET user/_search
{
 "query": {
   "term": {
     "name3.keyword": {
        "value":"张三"

     }
   }
 }
}
#keyword+text查询例子 当想用全文索引查询时,用match
GET user/_search
{
 "query": {
   "match": {
     "name3": "张三"
   }
 }
}

#创建索引的时候,text类型如果没指定使用分词器,就会默认内置的分词器,所以使用ik分词器时,创建索引时需要指定。
PUT user2
{
      "mappings" : {
      "properties" : {
        "age" : {
          "type" : "integer"
        },

        "name" : {
          "type" : "text",
          "analyzer": "ik_max_word",
         "search_analyzer" : "ik_max_word"

        },
         "name2" : {
          "type" : "keyword"
        },
           "name3" : {
          "type" : "text",
          "fields" : {
            "keyword" : {
            "type" : "keyword",
            "ignore_above" : 256
            }
          },
          "analyzer": "ik_max_word",
          "search_analyzer": "ik_max_word"
        },
        "hobby" : {
          "type" : "text",
          "analyzer": "ik_max_word",
         "search_analyzer" : "ik_max_word"
        }
      }
    }
}

#把user的数据复制到user2。
POST _reindex
{
  "source":{
    "index":"user"
  },
  "dest":{

    "index":"user2"
  }
}
#次查询user “爱祖国”,得到2数据 因采用默认分词器。
GET user/_search
{
 "query": {
   "match": {
     "hobby": "爱祖国"
   }
 }
}


#再次查询user2 “爱祖国”,得到一条想要的数据,没有多余数据。证明ik分词在索引中生效了。
GET user2/_search
{
 "query": {
   "match": {
     "hobby": "爱祖国"
   }
 }
}


#查询原因
GET /_cat/shards?h=index,shard,prirep,state,unassigned.reason

#返回未分配索引每个分片的详情和未分配的原因,
GET /_cluster/allocation/explain?pretty

#查看设置
GET /newsinfo/_settings

#重置分片
PUT /newsinfo/_settings
{
    "number_of_replicas": 0
}

#重新分配
PUT /newsinfo/_settings
{
    "number_of_replicas": 2
}

#查看分词器 默认
POST _analyze
{
  "analyzer": "standard",
  "text": "我是中国人"
}

#ik  ik_smart 最少切分算法
POST _analyze
{
    "analyzer":"ik_smart",
    "text":"我是中国人"
}

#ik  ik_max_word 最细粒度切分算法
POST _analyze
{
    "analyzer":"ik_max_word",
    "text":"我是中国人"
}

#设置ik分词器
PUT school_index
{
  "settings" : {
  "index" : {
  "analysis.analyzer.default.type": "ik_max_word"
    }
  }
}
附:
https://blog.csdn.net/pyfysf/article/details/131448092
本文为崔凯原创文章,转载无需和我联系,但请注明来自冷暖自知一抹茶ckhttp://www.cksite.cn

- 最新评论
- 总共0条评论

